

Previously, I wrote about how bending down towards the floor is commonly used during daily movement and somehow mistakenly has also been utilized as a self-stretch. Hopefully the last article I wrote helped you appreciate how, when done repeatedly, bending down towards your toes can lead to lumbar symptoms. (You can find that article : here). I offered a suggestion regarding how performing a hip hinge is an appropriate substitute for bending through your back, and also mentioned how there are more safe ways to stretch as well. Below, I am going to describe the hip hinge and how to correctly perform the movement. As for the previous comment about more safe ways to stretch, more on that later.
I like the hip hinge for several reasons. The hip hinge is purely a sagittal plane movement through the hip joint which helps engage the posterior chain (glutes and hamstrings), which often is weaker due to anterior chain dominance (i.e. quads). Best and perhaps most importantly of all, the movement spares the spine and prepares you for several activities of daily living and is a good precursor/injury prevention tool for more athletic movements. We already know that the typical low back patient moves excessively through their low back during daily activities; but learning how to hip hinge effectively is a movement pattern that can assist the cervical spine patient who looks down too often, the anterior knee pain patient with inhibited glutes and hamstrings, and our elderly patients who need help transitioning from sit-to-stand.
Physical therapists and patients alike will tell you, learning how to correctly perform a hip hinge and then incorporating it into daily activities is easier said then done. Because most people have already trained their body to move a certain way, often times re-programming to move a different way, even though it’s more beneficial, is a foreign concept.
I have found that the most effective way to coach this movement is with the proprioceptive input gained from using a dowel rod. Having the dowel to help learn the movement provides the patient with the neural feedback to assess the movement and be more aware of inconsistencies when practicing correct form.
Here are the coaching tools I use to teach the hip hinge:
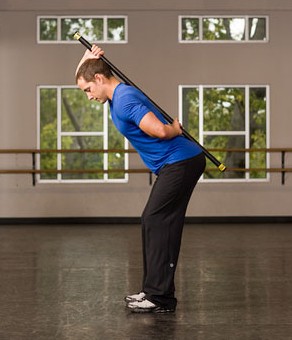 Step 1: Utilize the stick to create 3 points of contact: 1)Occiput, 2)Thoracic Spine, 3)Sacrum
Step 2: Keep a slight bend in the knees with feet slightly wider than shoulder width apart
Step 3: Engage your transverse abdominis and gluteal region (teaching points on how to do these actions will have already been instructed)
Step 4: Hinge forward—push butt back and keep chest up
The spine should remain neutral throughout the entire movement and the knee should not bend excessively either.
